Backing up and restoring your AppGini database
It's crucial for any application in production to have a reliable backup and restore mechanism. AppGini applications come with a built-in feature to back up and restore your database.
Prefer to watch a video tutorial? Check out our Backing up and restoring your AppGini database video on YouTube.
Backing up your AppGini database
To back up your AppGini database, follow these steps:
- Log in to your AppGini application as an administrator.
- Click on the Admin area link in the top menu.
- In the Admin area, open the Utilities menu and select Database backups.
-
(Optional) To customize which table groups to include in the backup, click the Choose what to back up link to expand the backup options.
Note: This feature was added in AppGini 25.14.
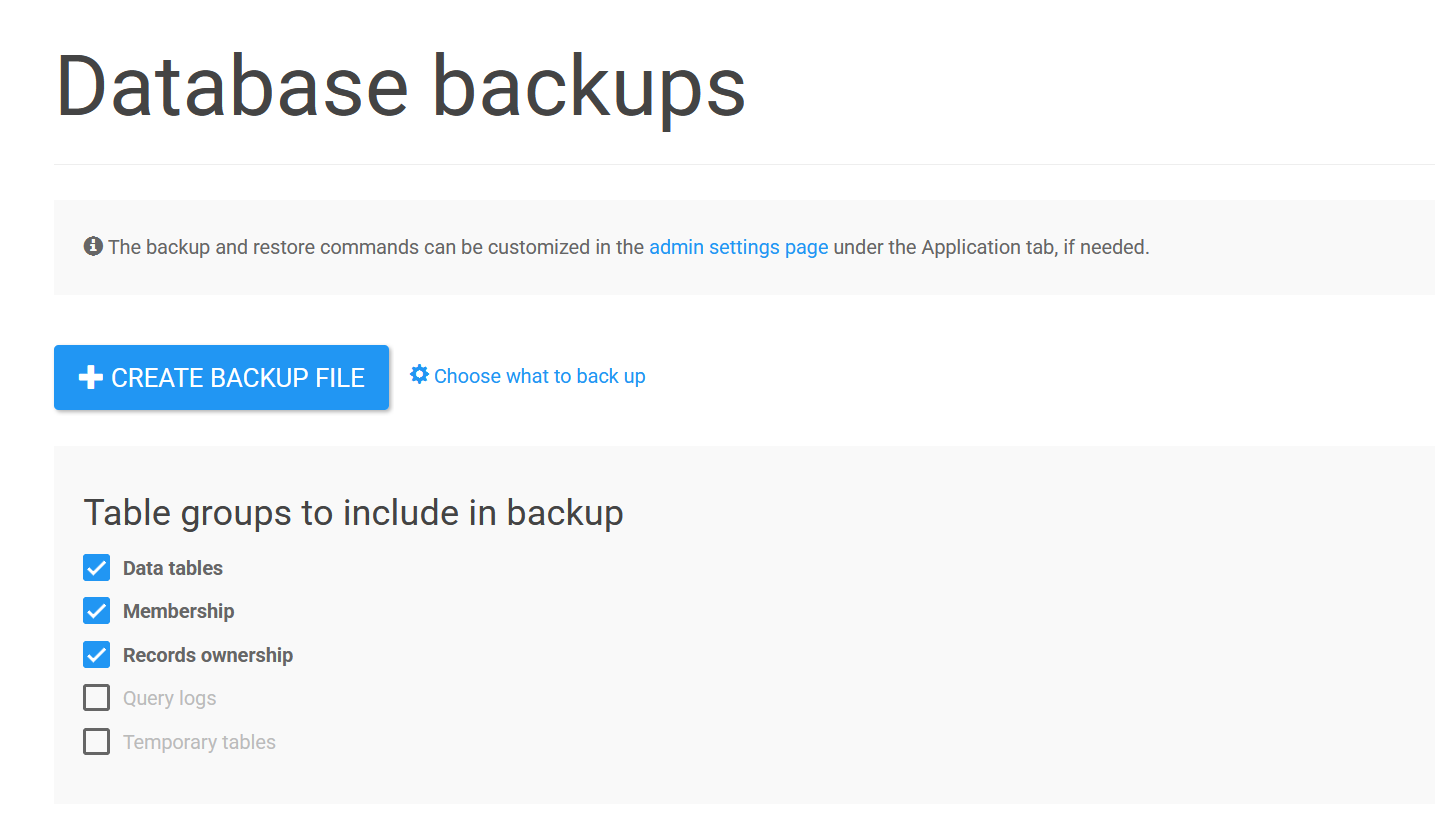
You can select which table groups to include in your backup:
- Data tables (checked by default): Your application's business data tables
- Membership (checked by default): User accounts, groups, and permissions
- Records ownership (checked by default): User-record association mappings
- Query logs (unchecked by default): Slow and error SQL queries logs
- Temporary tables (unchecked by default): Temporary cache and session data used by the application
The default selection (Data tables, Membership, and Records ownership) is recommended for most backup scenarios. Query logs and temporary tables are typically optional and can be excluded to reduce backup size.
-
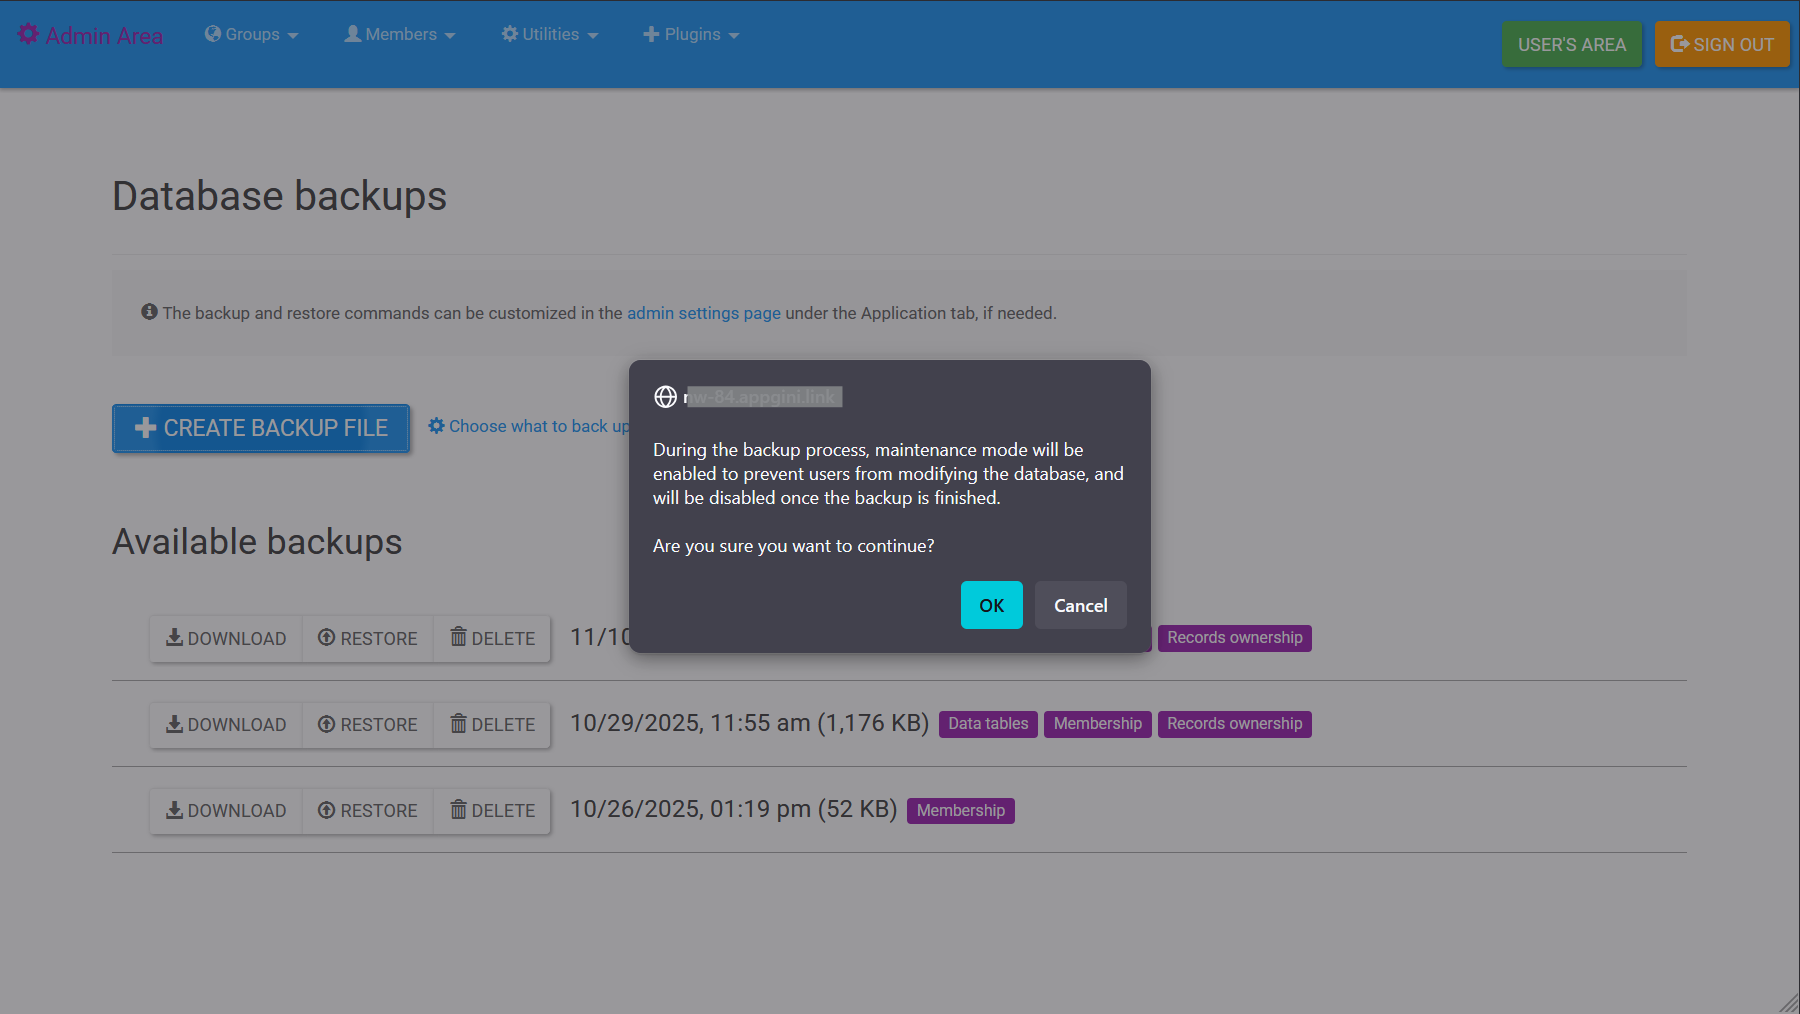
On the Database backups page, click the Create Backup File button.
-
A confirmation dialog will appear, informing you that the application will be set to maintenance mode during the backup process. Click OK to proceed.
Usually the backup process takes only a few seconds, but it may take longer for larger databases. During this time, the application will be in maintenance mode, and users will not be able to access it.
-
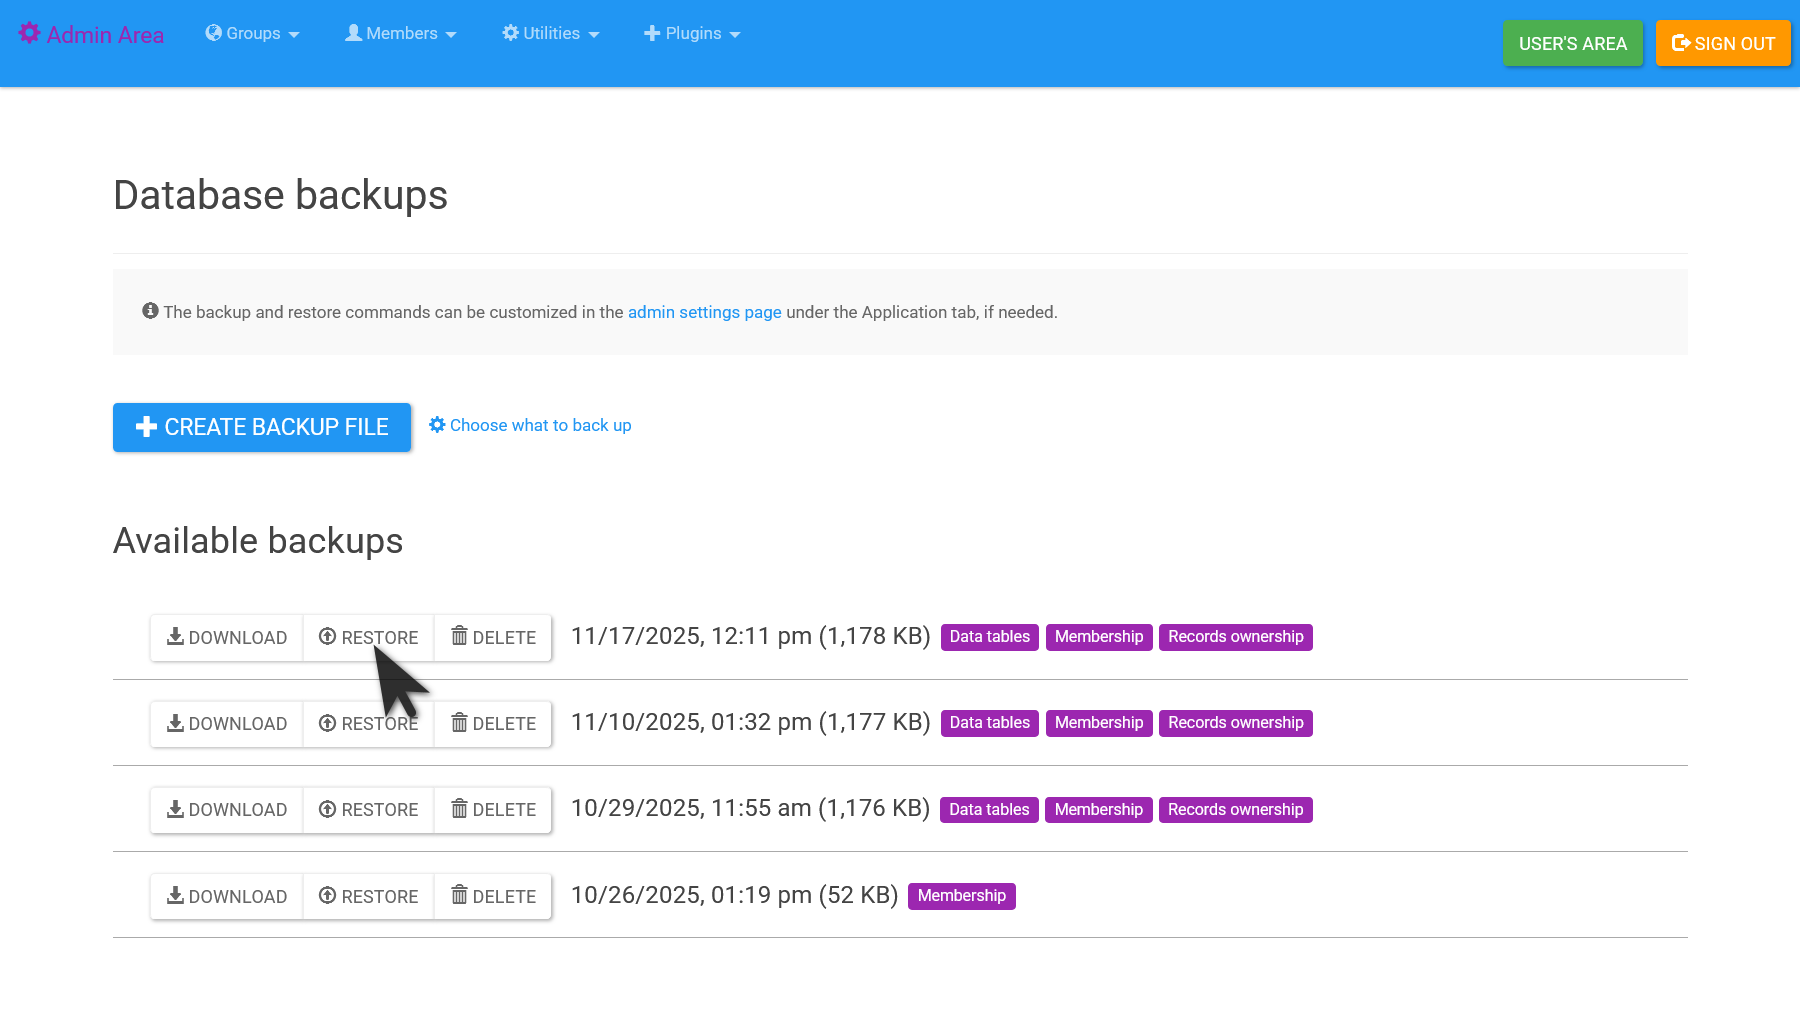
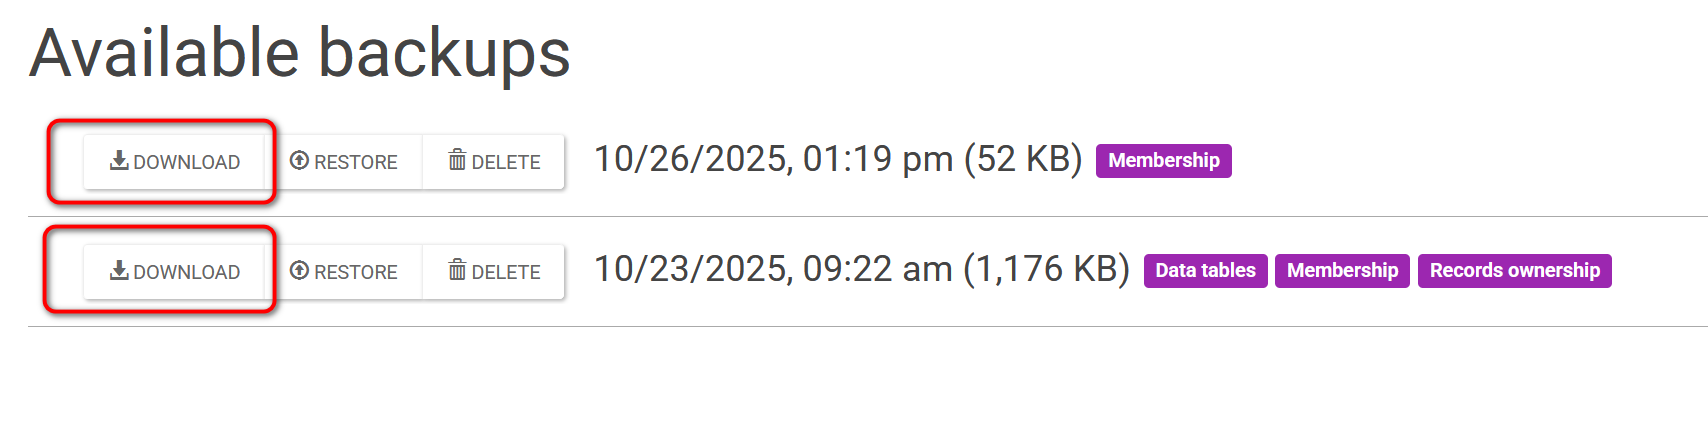
Once the backup is complete, it will be listed under the Available backups section, showing the date, time, size, and included table groups of the backup file.

Each backup displays colored labels indicating which table groups are included, making it easy to identify what's in each backup file.
Restoring your AppGini database
To restore your AppGini database from a backup file, follow these steps:
- Log in to your AppGini application as an administrator.
- Click on the Admin area link in the top menu.
- In the Admin area, open the Utilities menu and select Database backups.
- On the Database backups page, find the backup file you want to restore from the Available backups section.
-
Click the Restore button next to the backup file you want to restore.
-
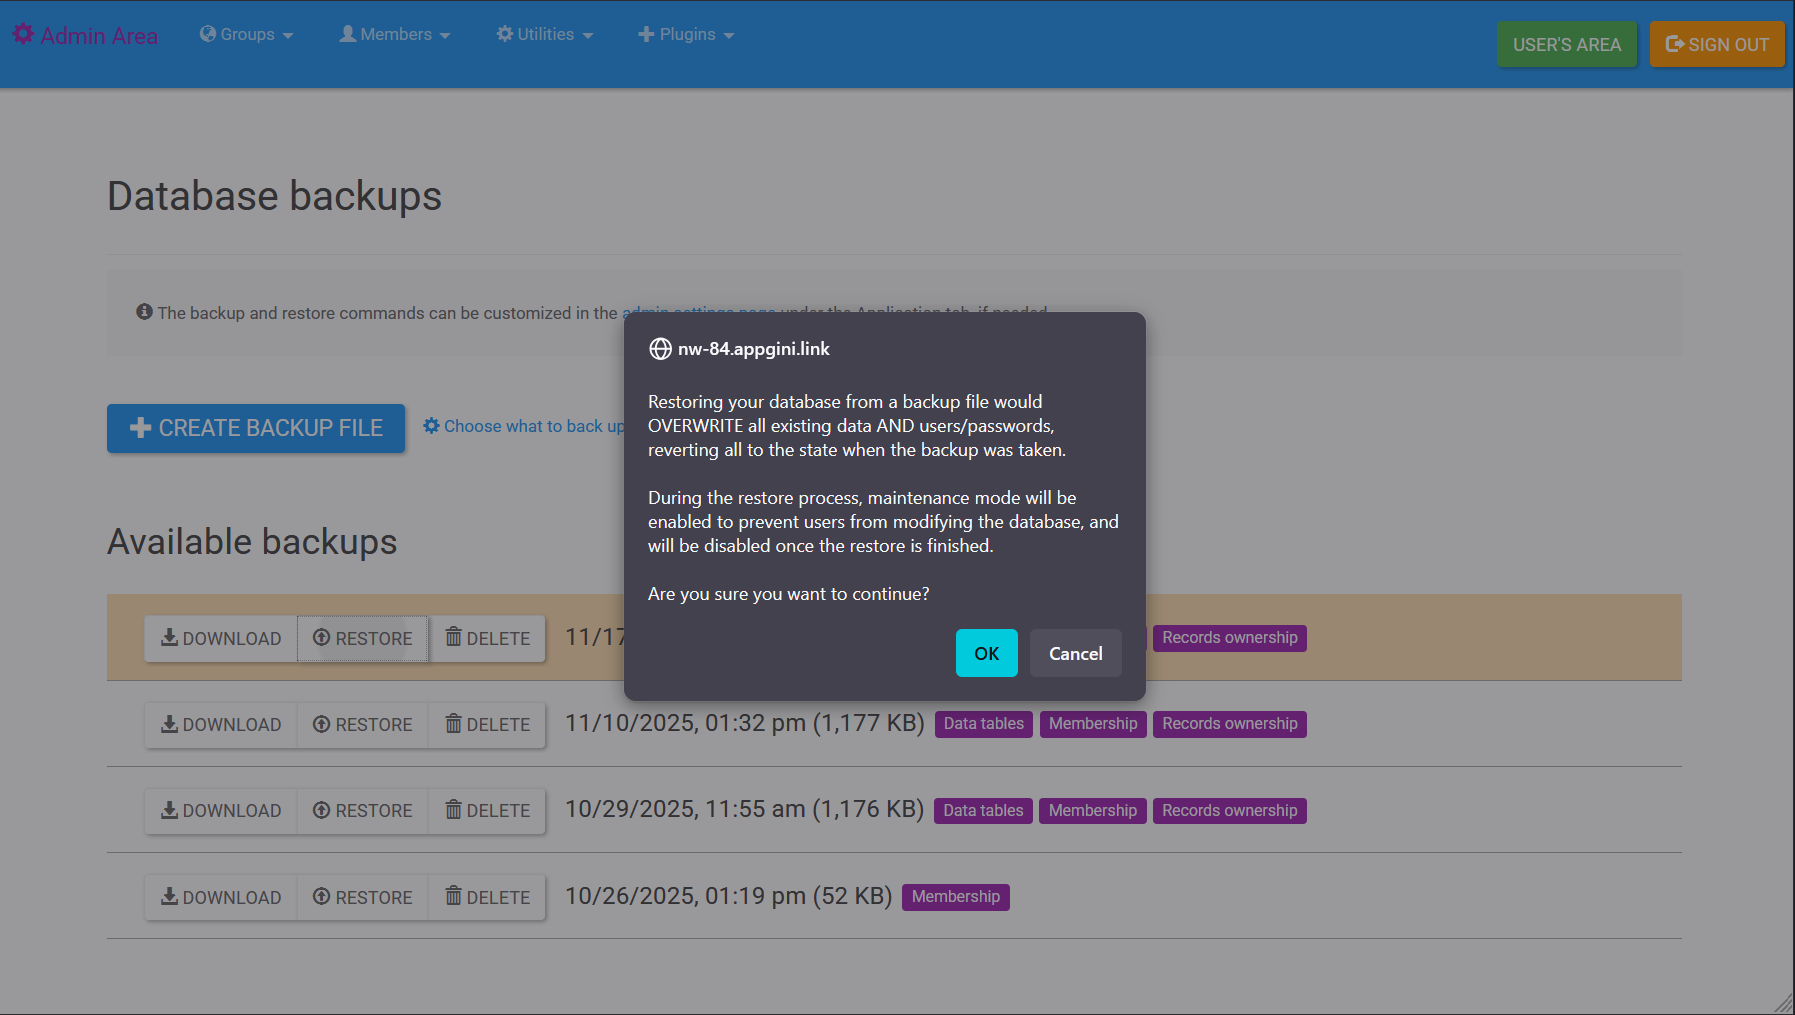
A confirmation dialog will appear, informing you that the application will be set to maintenance mode during the restore process, and that all data in the current database will be replaced with the data from the backup file. This includes user accounts, settings, and all data in the database. Click OK to proceed.
Restoring a backup takes a few seconds, but it may take longer for larger databases. During this time, the application will be in maintenance mode, and users will not be able to access it.
-
Once the restore is complete, the application will exit maintenance mode, and you will see a success message indicating that the database has been restored successfully.
Downloading backup files
Note: This feature was added in AppGini 25.14.
You can download backup files directly from the Database backups page without needing FTP or command-line access:
- Log in to your AppGini application as an administrator.
- Navigate to Admin area > Utilities > Database backups.
- In the Available backups section, locate the backup file you want to download.
-
Click the Download button next to the backup file.
-
The backup file will be downloaded to your computer as a
.sqlfile. You can save it in a secure location for safekeeping or transfer it to another server.
Downloading backup files is useful for creating off-site backups, migrating to a new server, or performing manual database operations.
Understanding table groups
Note: Selective table group backups were added in AppGini 25.14.
AppGini organizes database tables into logical groups to give you fine-grained control over what's included in your backups. Understanding these groups helps you create optimized backups based on your needs:
Data tables
This group includes all your application's business data tables - the tables you created in AppGini to store your actual application data (customers, orders, products, etc.). This is typically the most important group and should be included in all backups.
Membership
This group contains the following tables related to user management and access control:
membership_users- User accountsmembership_groups- User groupsmembership_grouppermissions- Group-level permissionsmembership_userpermissions- User-level permission overrides
Include this group when you need to preserve user accounts, groups, and their permissions.
Records ownership
This group contains the membership_userrecords table, which maps which users own which records in your application. It also includes the appgini_saved_filters table, which stores user-specific saved filters.
Include this group when you need to preserve the relationship between users and the records they own and their saved filters.
Query logs
This group contains tables that store logs of slow and error SQL queries executed by the application. These logs can be useful for debugging and performance analysis. But they are typically not essential for most backup scenarios.
Temporary tables
This group includes temporary tables used by the application for various operations. These tables typically contain transient data that doesn't need to be backed up.
It's generally safe to exclude this group from backups to save storage space and reduce backup time.
Migrating your AppGini application to a new server
If you are migrating your AppGini application to a new server, you can use the backup and restore feature to transfer your database. Here's how:
- Create a backup of your AppGini database on the old server by following the steps outlined in the "Backing up your AppGini database" section above.
-
Download the backup file using one of these methods:
- Using the built-in download feature (recommended): Click the Download button next to the backup file in the Database backups page (see "Downloading backup files" section above).
- Using FTP: Access the
admin/backupsdirectory of your AppGini application on the old server using an FTP client like FileZilla, and download the backup file. The file will have a.sqlextension and be named as a random string, such as523f4e5d6b7c8d9e.sql. -
Using command line: If you have shell access, list the most recent backup file using the following command (assuming you are in the root directory of your AppGini application):
-
Upload the backup file to the
admin/backupsdirectory of your AppGini application on the new server.Make sure that the web server user has write permissions to this directory. If you are using an FTP client, you can set the permissions to
755or775for theadmin/backupsdirectory. -
Log in to your AppGini application on the new server as an administrator.
You still need to set up the application and database connection settings on the new server before you can log in. But once you restore the database, you can log in to the application using the same credentials as on the old server.
-
Go to the Admin area and open the Utilities menu, then select Database backups.
- Find the backup file you uploaded in the Available backups section.
- Click the Restore button next to the backup file you want to restore.
- Confirm the restore operation in the dialog that appears, and wait for the process to complete.
Requirements
To use the backup feature, your server must have the mysqldump utility installed. This utility is typically included with MySQL installations, so if you have MySQL installed, you likely have mysqldump available.
And to be able to restore a backup, your server must have the mysql command-line client installed. This is also typically included with MySQL installations.
Installing MySQL command-line utilities
In some environments, MySQL may be installed on a separate server, and your application server may not have direct access to the MySQL command-line utilities mentioned above. To enable the built-in backup and restore feature to work in such cases, you can install the MySQL command-line utilities on your application server. Assuming you have root access to your server, you can install these utilities using the following commands:
- For Debian/Ubuntu-based systems:
- For Red Hat/CentOS-based systems:
- For Windows systems: Download the MySQL Installer from the MySQL website and select the "MySQL Server" and "MySQL Client" components during installation.
- For macOS systems: If you have Homebrew installed, you can use the following command:
Troubleshooting
If you encounter any issues during backup, check the following:
- Ensure that the
mysqldumputility is installed and accessible from the command line. - Make sure the database credentials in your AppGini application have the necessary permissions to perform backups and restores.
- If your application is stuck in maintenance mode after a failed backup or restore attempt, you can manually exit maintenance mode by deleting the
.maintenancefile located in theadmindirectory of your AppGini application. -
Make sure the web server user has write permissions to the directory where the backup files are stored, which is the
admin/backupsdirectory inside your AppGini application directory.To change the permissions, you can use the following command:
If you're unable to restore a backup, ensure that the backup file is not corrupted and that the backup directory is readable by the web server user.
Customizing backup and restore commands
Note: This feature was added in AppGini 25.14.
If you need to customize the mysqldump or mysql commands used for backups and restores, you can do so from the admin settings page:
- Log in to your AppGini application as an administrator.
- Navigate to Admin area > Utilities menu > Admin settings.
- Click on the Application tab.
- Look for the Database backup command and Database restore command fields.
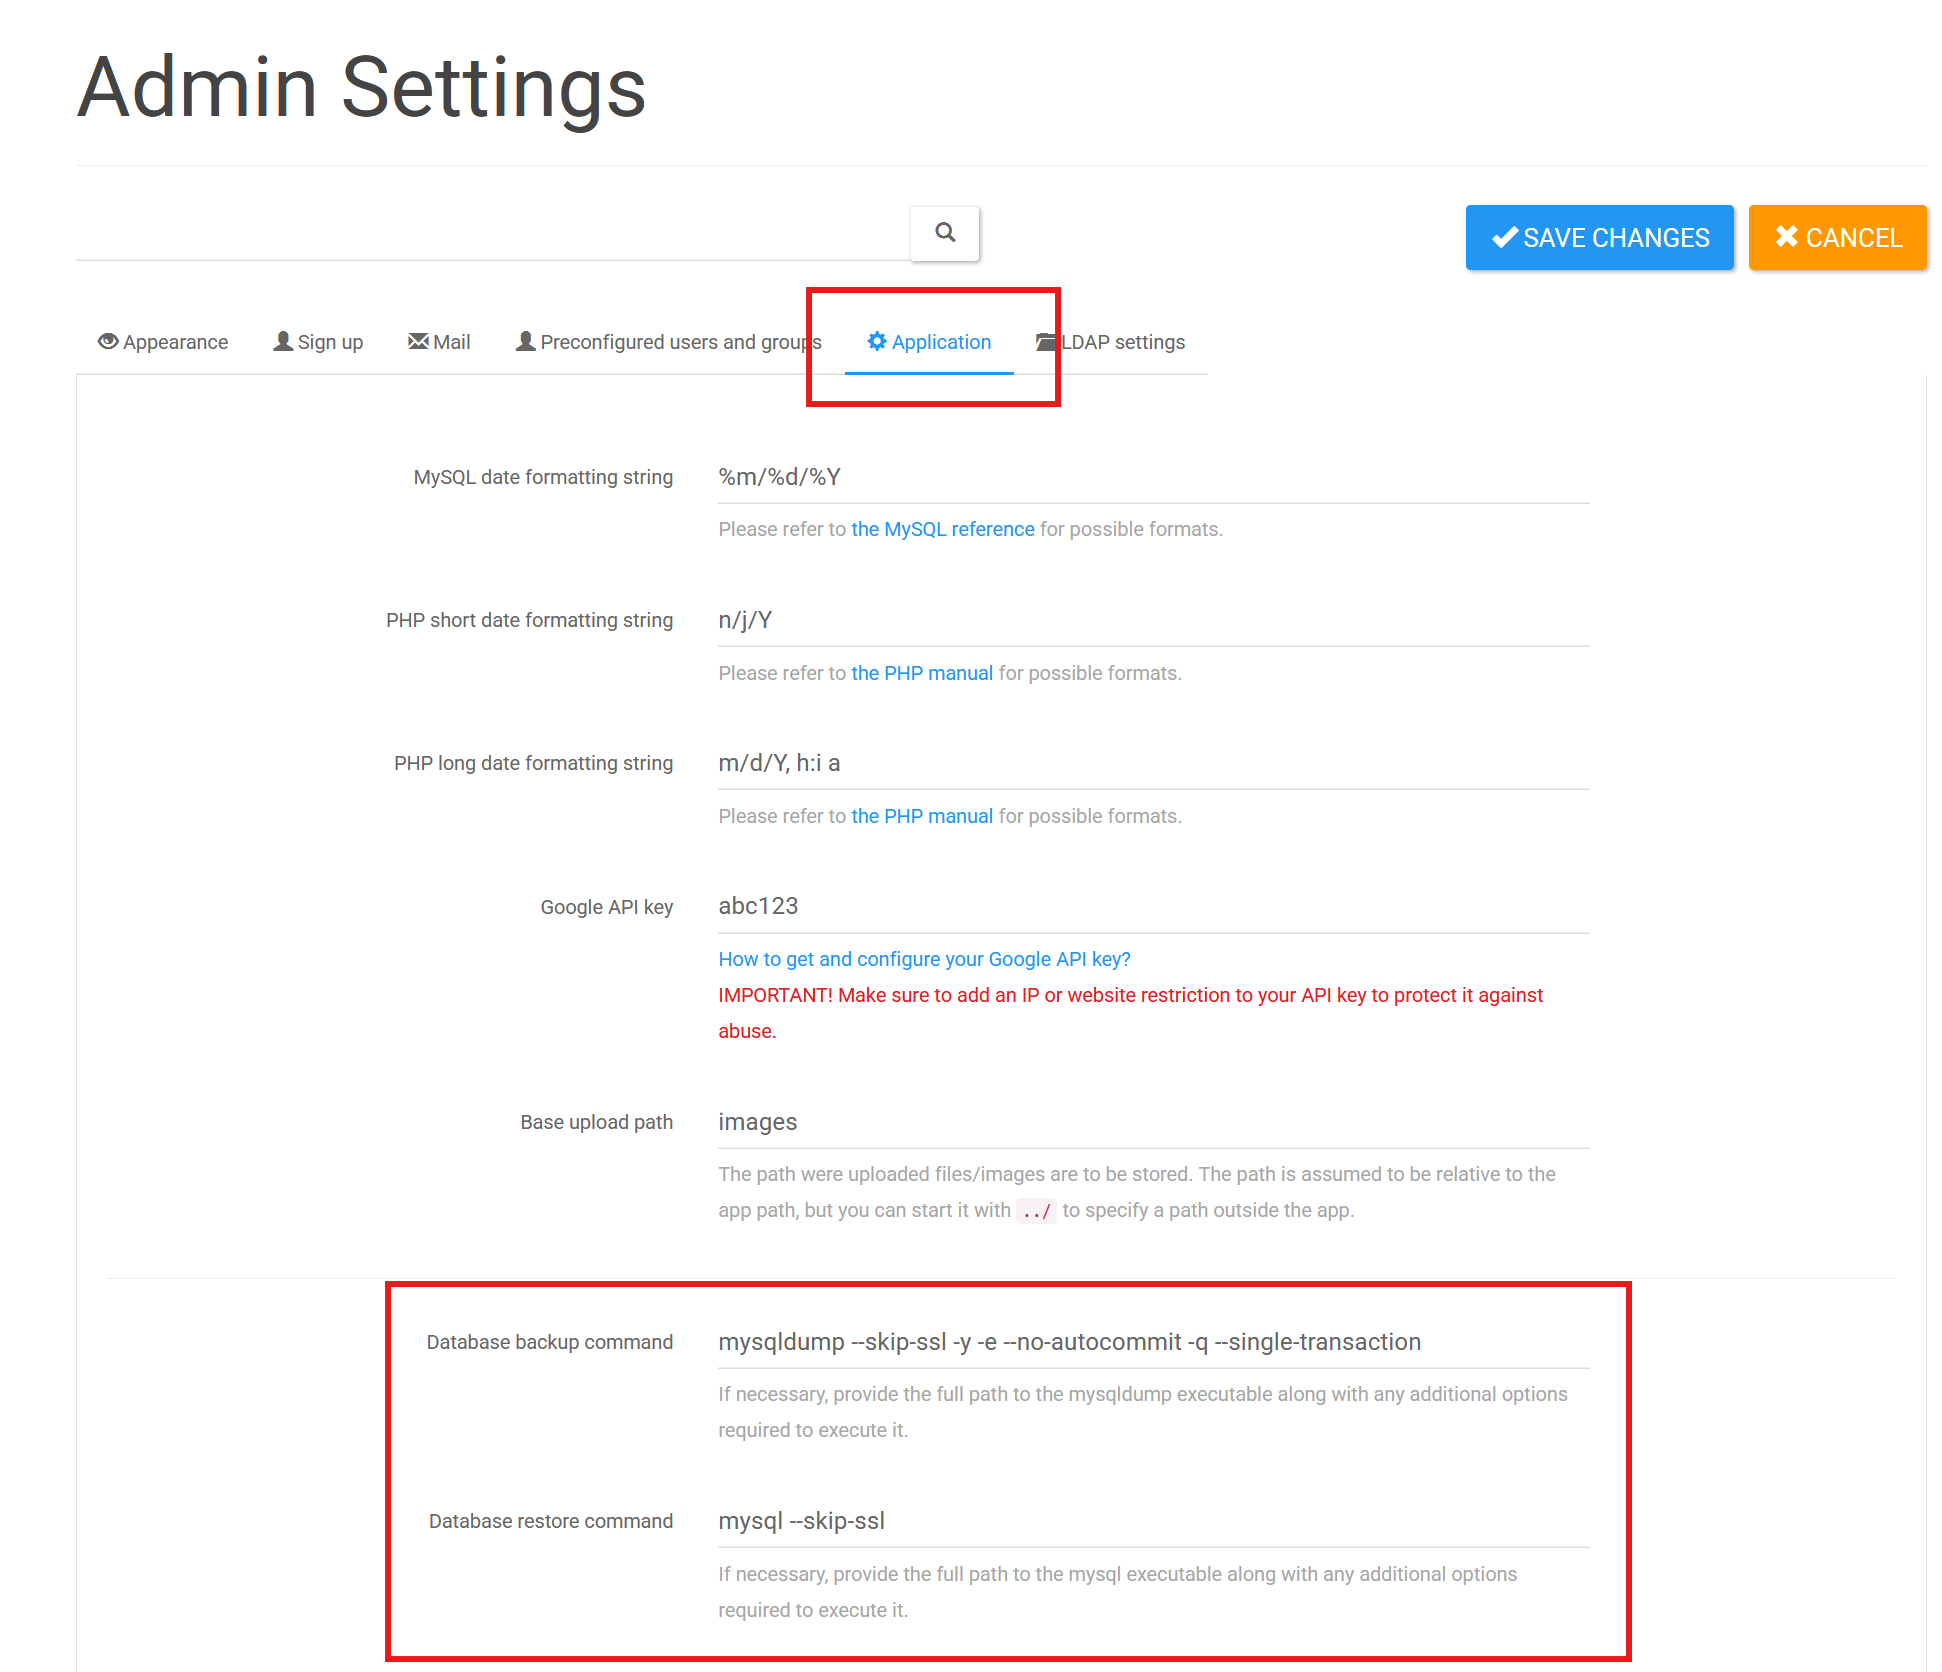
You can customize these commands to:
- Specify the full path to the command if it's not in the system PATH (e.g.,
/usr/local/mysql/bin/mysqldump) - Add extra options required by your environment (e.g.,
--skip-sslto disable SSL,--single-transactionfor InnoDB tables, etc.) - Configure connection options specific to your MySQL setup
For example, if you need to disable SSL for backups, you could modify the backup command to include --skip-ssl:
Or if you need to specify the full path and additional options:
To revert to the default commands, simply clear the custom command fields and save the settings. This will restore the original commands used by AppGini.
Important: Make sure any customizations you make are compatible with how AppGini uses these commands. The application automatically adds database credentials, table names, and other necessary parameters to the commands you specify.