
In this post, we're going to learn how to create great looking HTML forms quickly and easily using AppGini. AppGini allows you create beautiful self-hosted forms and have full ownership of your data and the generated source code. Protect your users privacy and comply with GDPR and other privacy regulations by hosting your forms on your own server. And, as a bonus, have full control over the form design, branding, and integration with other tools and services. All this without writing a single line of code!
There are many use cases for creating HTML forms. Some of the most common use cases include:
Creating HTML forms manually can be time-consuming and error-prone. Instead, you can use an HTML form generator to create forms quickly and easily. Advantages of using an HTML form generator include:
AppGini is a powerful web application builder that can help you create HTML forms quickly and easily. Form submission data are stored in a MySQL database, which makes it easy to manage and analyze the data collected through the form.
To create an HTML form using AppGini, follow these steps:
Although the above steps might seem complex, AppGini makes the process of creating HTML forms simple and intuitive. And once you've walked through the process a couple of times, you'll be able to create not just simple forms, but complex web applications with ease.
Let's now walk through the steps of creating an HTML form using AppGini in more detail.
AppGini is a desktop application that runs on Windows. You can download the latest version of AppGini for free here.
Once you've downloaded the installer, double-click on it to start the installation process. Follow the on-screen instructions to complete the installation. When the installation is complete, you can launch AppGini by double-clicking on the desktop shortcut or by opening the start menu and typing "AppGini" in the search bar.
When you launch AppGini, you'll see the welcome screen. Click on the Start a new project icon to start a new project.
This will display the project properties pane as shown below:

Press F2 to rename the project to something meaningful. For example, you can name it "contact_form".
AppGini comes with many built-in themes that you can use to style your forms. These themes are responsive and mobile-friendly, so your forms will look great on any device. There are light and dark themes available. You can choose a theme by clicking on the Edit theme button in the project properties pane.

You can select a theme from the dropdown list at the bottom of the theme editor. This would display a preview screenshot of the selected theme. If you click the Preview in browser button, you can see how your form will look in a web browser.
Once you've selected a theme, click the Apply button to save your changes.
To create a form, you need to add a table to your project. A table is a collection of fields that define the data that will be collected through the form. To add a new table, click on the New table button in the project properties pane. This will add a new table in the left section of the AppGini window named "table1". You can rename this table to something more meaningful, such as "contacts".

There are 2 important properties you need to set for the table to improve the form submission experience:
Here is a screenshot of the contacts table with the form title and thank you page URL set:

Once you've added a table, you need to add fields to the table. Fields define the data that will be collected through the form. For example, you can add fields such as "name", "email", "phone", "message", etc.
To add a field, click on the New field icon in the top toolbar. Alternatively, you can press Ctrl + F to add a new field.
This will add a new field under the table in the left section of the AppGini window. You can rename this field to something meaningful, such as "name".

Repeat this process to add more fields to the table. For example, you can add fields for "email", "phone", "message", etc.
HINT: One powerful feature of AppGini is that it supports many field types, such as text, email, textarea, checkbox, radio, dropdown, etc. AppGini even supports advanced field types, such as file upload, image upload, YouTube video, Google Maps, etc. You can learn more about field types in AppGini here.
One more field that you need to add is a field named id. This field is required by AppGini to uniquely identify each record in the table.
You can hide this field from the form by checking the Hide in detail view checkbox in the field properties pane.
Here is the contacts table with all the fields added:

Once you've added the table and fields, you can generate the application containing the form. To do this, click on Generate app button in the top toolbar or in the project properties pane (the one with a red magic wand icon).
This will display a dialog asking you to select a folder where the generated files will be saved. Make sure to select an empty folder to avoid mixing the generated files with other files in the folder or overwriting any existing files.

Click the Continue button to start the generation process. AppGini will generate the files and display a success message once the process is complete.

Once the generation process is complete, you can upload the generated files to your website. There are many ways to upload files to a website. AppGini provides a built-in file uploader that allows a one-click upload to your website. You can also use an FTP client, such as FileZilla, to upload the files.
When you upload the generated files to your website, you need to set up the form to define the database credentials. This is necessary to allow the form to connect to the MySQL database where the form submission data will be stored.
Visit the application URL in your web browser to begin the setup process.

By default, the form generated by AppGini requires users to log in before they can submit data. If you want to allow anonymous users to submit data, you need to adjust the form permissions.
To do this, log in to the admin area of your application (using the username and password you set up during the setup process). Open the Groups menu and click on the Edit anonymous permissions link.

This will open a page where you can adjust the contacts table permissions for anonymous users. You should allow anonymous users to Insert records in the table, but not View, Edit, or Delete records. See the screenshot below for an example of how to set up permissions for anonymous users.

Click the Save changes button to save your changes.
Once you've set up the form permissions, you can publish the form URL on your website or via other channels like
social media, email, etc. to start collecting data. The direct URL to the form can be composed by appending table1_view.php?addNew_x=1&Embedded=1 to the application URL.
Replace table1 with the name of the table you created in step 4, for example, contacts_view.php?addNew_x=1&Embedded=1.
So, if your application URL is https://example.com/contact_form, the direct URL to the form would be https://example.com/contact_form/contacts_view.php?addNew_x=1&Embedded=1.
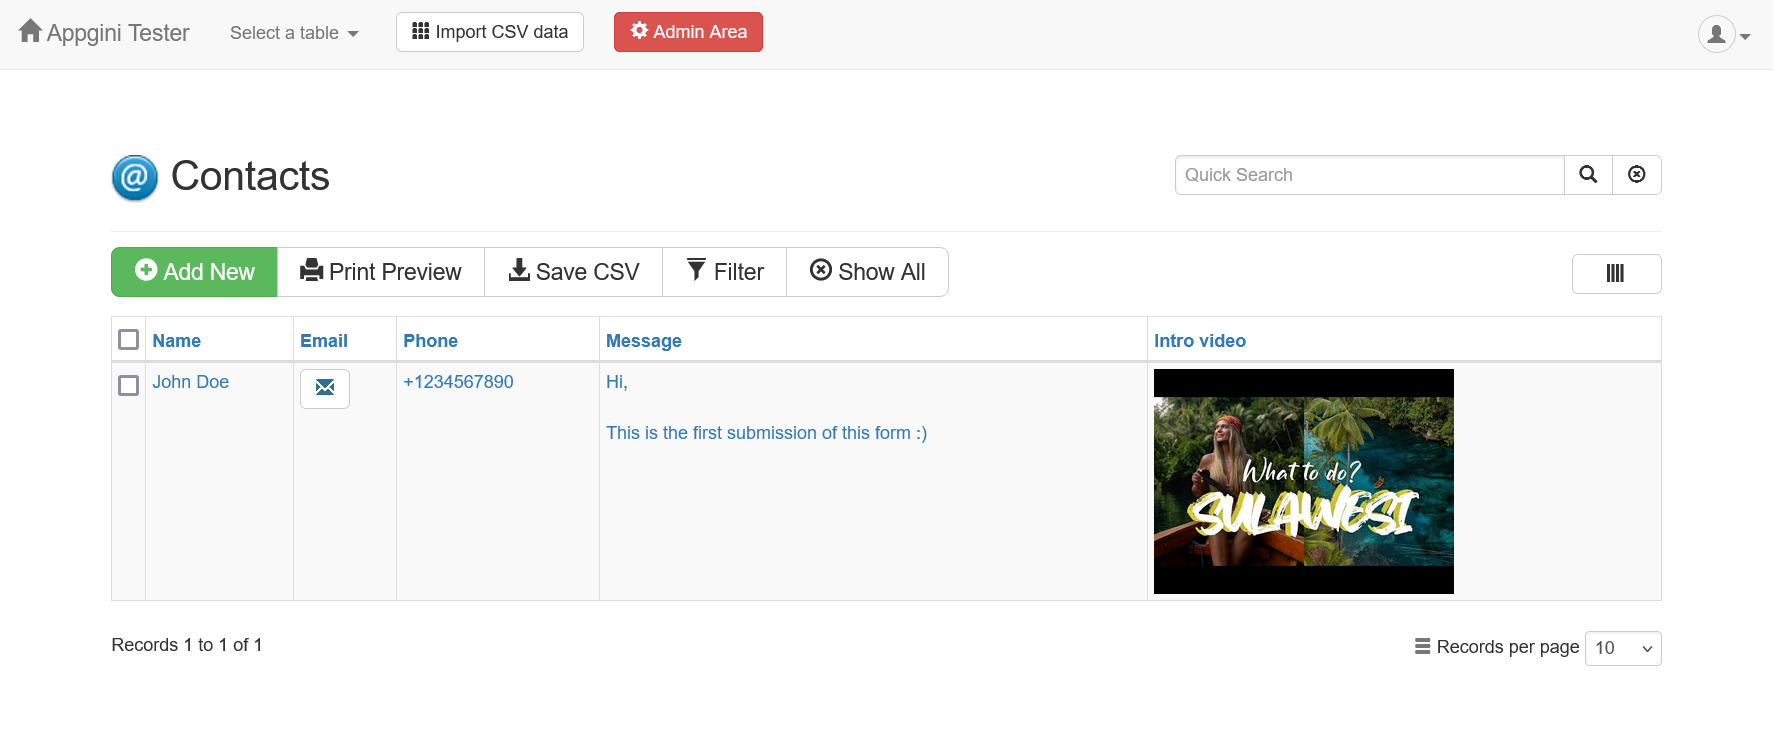
This would open the form in the browser, allowing users to submit data without logging in. Here is how the form would look:

And that's it! You've successfully created an HTML form using AppGini. You can now start collecting data through the form and manage the data in the MySQL database.
To view the data submitted through the form, log in to your contact form application as the admin user (using the username and password you set up during the setup process in step 8 above). Click on the contacts table in the application home page to view the submitted data.
You can view, edit, delete, and export the data as needed. You can also set up email notifications to receive an email whenever a new record is submitted through the form.
AppGini is a powerful web application builder that can help you create not just simple forms, but complex web applications with ease. You can create applications with multiple tables, relationships between tables, advanced user management, easy customization, and many other features.
If you're interested in learning more about AppGini, you can check out the official documentation, video tutorials, and community forums.
So why waste time creating HTML forms manually when you can use AppGini to create forms quickly and easily?
I hear your skepticism. Yes, you can use Google Forms or Typeform to create forms quickly and easily. But there are some limitations to using these services that they don't tell you about upfront:
Data ownership: When you use Google Forms or Typeform, the data collected through the form is stored on their servers. This means that you don't have full control over your data and are subject to their terms of service.
Branding: Google Forms and Typeform have limited customization options, so it can be challenging to match the form design to your website's branding.
Integration: Google Forms and Typeform have limited integration options with other tools and services. For example, you might not be able to integrate the form with your CRM system or email marketing platform.
Privacy: Google Forms and Typeform are hosted services by third-party companies. They might collect data about your users and use it for their own purposes. And if you are trying to comply with GDPR or other privacy regulations, this would make the compliance process more complex.
Maintenance and future-proofing: Google Forms and Typeform are hosted services, so you are at the mercy of the service provider. If they decide to discontinue the service or change their pricing, you might be left in a lurch. Also, if you want to make changes to the form in the future, you might be limited by the service's capabilities.
So, while Google Forms and Typeform are great for quick and simple forms, if you need more control over your data, branding, integration, privacy, and future-proofing, AppGini is a powerful alternative that gives you full control over your forms and data. This includes not only the full ownership of your data but also the generated source code, which you can customize and host on your own server.
Give AppGini a try and see how easy it is to create HTML forms and web applications without writing a single line of code!