Creating customized search forms
This tutorial shows you how to create a customized search form that users can use to search a particular table in your AppGini-generated web application. This search form we'll create would replace the standard filters page for the concerned table.
Note: This tutorial uses the hooks feature introduced in AppGini 4.50. It won't work with previous versions of AppGini.
What we want to do
First let's see the final result of this tutorial before explaining the steps (click the screenshot below to zoom in). We'll use the Northwind application as an example here. We want users accessing the Order Items table to see a search form that asks them to provide an order ID rather than seeing a list of all order items from all orders.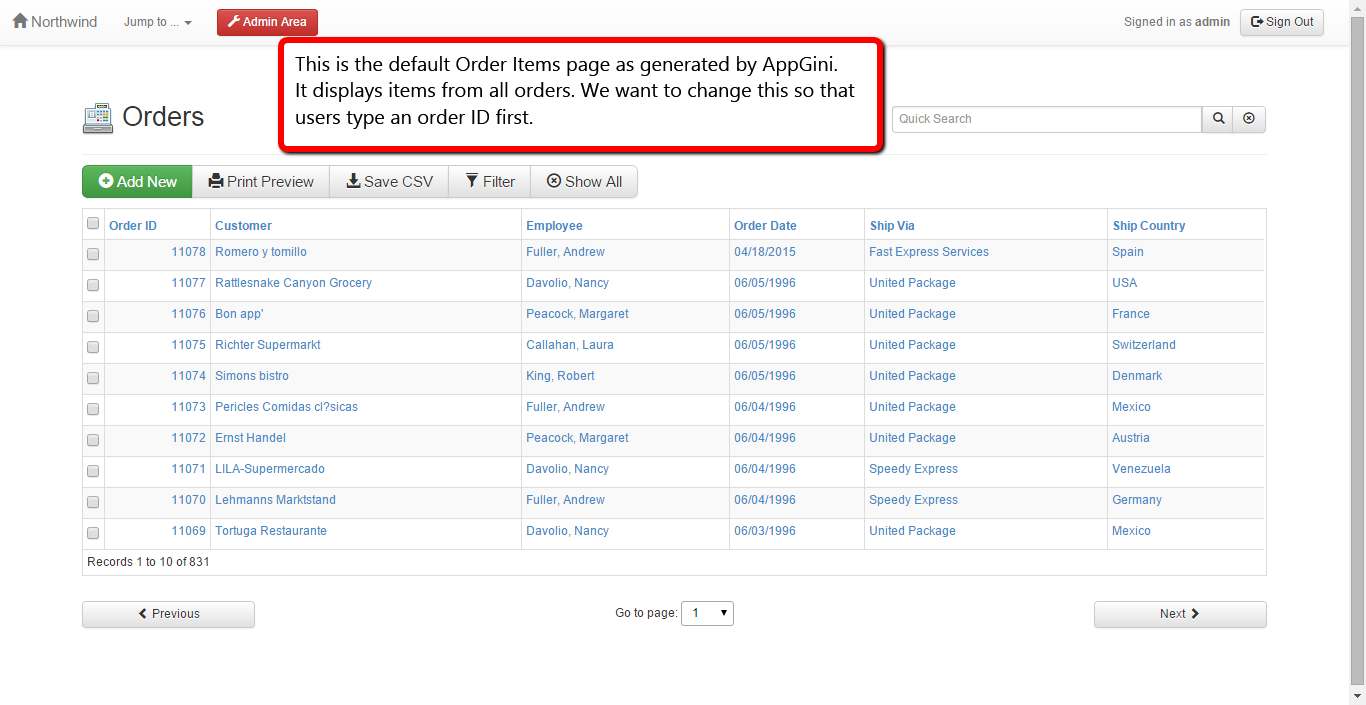

Step 1 of 4: Setting the search options in AppGini

The first step is to open our project in AppGini, and click on the name of the concerned table (Order Items in our example). We'll check 3 options if they aren't already checked: Allow filters, Allow users to save filters and Filter before showing table view. We should then generate our application.
Step 2 of 4: Get the code for our customized search
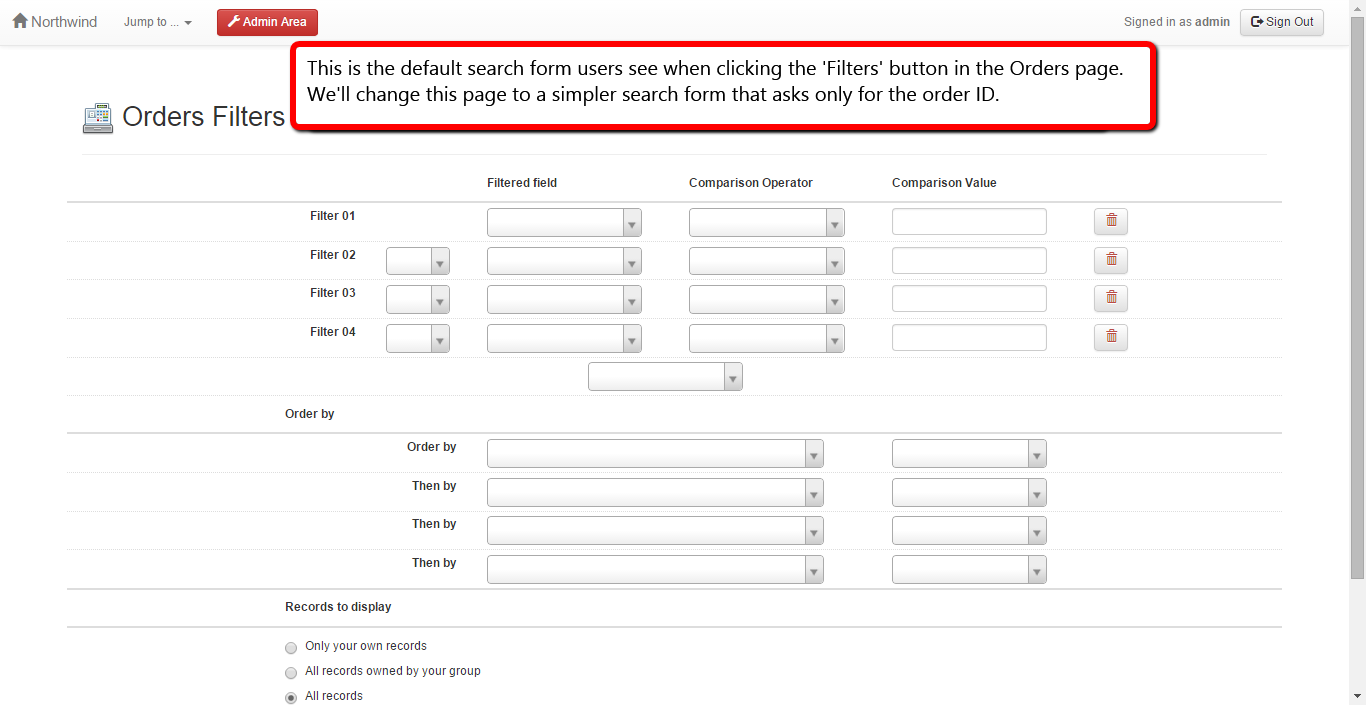
After generating (and uploading) our web application, we'll now see the filters page whenever we try to access the Order Items table. Notice that this page includes a Save Filters button, which appears because we set the Allow users to save filters option in step 1 above. Let's now define the filter(s) we want to include in the customized search form. In our example, we want users to specify the order ID. So, let's search for an example order with an order ID of, say, 11000. See the screenshot below.
After clicking Save and apply filters, we should see the page below. Right-click the "permalink" link and copy the URL.

Next, visit our online tool, create a search form using a filters url, paste the permalink URL into the text box and click 'Get form code', then copy the search form code displayed in the black text area.
Step 3 of 4: Create a custom search page
Open your text editor and insert the following code in a new text file:Then, place the courser at line 3 in the above code, and paste the search form code we copied in step 2. You should now have the following in your text editor:Please enter the order ID
At line 6 above, note the type of the <input> tag that contains the search value we typed in step 2 (11000 in our example). It's set to hidden. We need to change that to text so that users can type the order ID in an input box. We should also remove the order ID we typed to leave the field empty. Finally, we might want to change the text of the submit button from Show Filtered Data to a more meaningful label, like View Order Items. Here is our code after making these changes:Please enter the order ID
We're done with the customized search form. Let's save it inside the generated "hooks" folder. I'll give it the name order_details_filter.php, but you can use any arbitrary name.Please enter the order ID
Step 4 of 4: Activate the customized search page
The final step is to open the generated hooks/order_details.php file in your text editor (replace order_details with the actual name of the concerned table). Search for the word init. This would lead us to the tablename_init() hook. Modify the hook to read:
	function order_details_init(&$options, $memberInfo, &$args){
		// activate the customized search page
		$options->FilterPage = dirname(__FILE__).'/order_details_filter.php';

		return TRUE;
	}
If you used a different name for your customized search file, you should change the file name in line 3 above.
That's it at last! Now, whenever your users try to access the Order Items table, they'll see the customized search page we created above, where they'll type an order ID and click the submit button to see the items of the given order.