Installing a local testing environment (xampp)
You can test your AppGini-generated web applications on a local machine before deploying them online. To do so, you need to install a web server, MySQL, and PHP. Of course, installing and configuring all of these programs is a lot of headache. Fortunately, there is an easier way: download and install Xampp, a single download that takes care of all the necessary work in one shot.
Note: All of the above tools are free and open source software.
The first step is to download the latest version of Xampp installer for Windows, from Apachefriends.org. We recommend downloading Xampp installer with the latest version of PHP (was 5.5 at the time of authoring this tutorial) by clicking on the link shown in the screenshot below. Using the installer version (method A) is the easiest way to install XAMPP.

After downloading, start installing Xampp by following the installation steps as shown below.

Once the installation is complete, you will find Xampp under Start > Programs > Xampp. You can use the Xampp Control Panel to start/stop any components. We only need to start Apache and MySQL for the purposes of this tutorial.

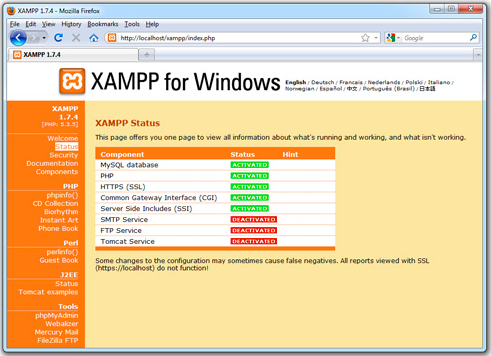
After starting Apache and MySQL, navigate to
http://localhost/ in your browser. If everything was installed correctly, you should see a page similar to the one below.
Now, let's open our project in AppGini and generate our application by clicking the magic wand icon. When asked to specify the output folder for the application, let's browse to the document root folder. For the default installation of Xampp, this would be "C:\Xampp\htdocs".


Usually, we don't want to generate our application directly into the document root itself, but rather to a subfolder of it. So, let's add "\test", for example, to the folder path. Even if there is no subfolder named "test", it would be automaically created. You should avoid using spaces (and capital letters) in the folder name. Use hyphens or underscores instead of spaces.

Once you are done generating the application, switch to your browser, type localhost/ followed by the subfolder name you entered when generating your AppGini application in the steps above. In our case, the URL would be localhost/test … You should see the page below.

If you haven't changed the security settings of Xampp, you should enter "root" as the database username and leave the database password empty when prompted. After you finish the setup steps, your application would be accessible on your local PC.