The Media Tab
This tab allows you to configure your field to be displayed as a web-link, an image, a file, a Google map or even a YouTube video.
Link option
Configure the way your field behaves when clicked. It can be configured to open the detail view of the current record, a URL, an email link, or not be clickable at all.
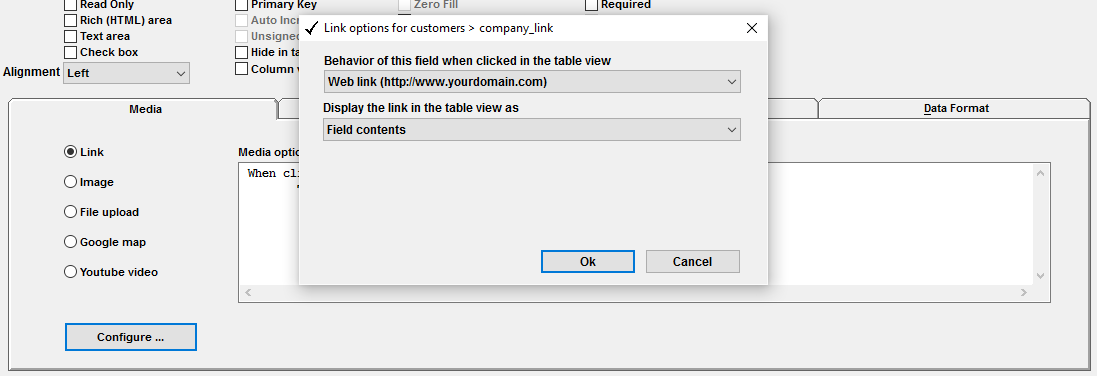
If you configure the field to display as a web-link and the user clicks that field, the link is opened in a new window.

The Image option
This option allows you to configure the field to be displayed as an image. You can allow users to upload jpg, jpeg, gif and png images. You can also configure the maximum allowed file size.
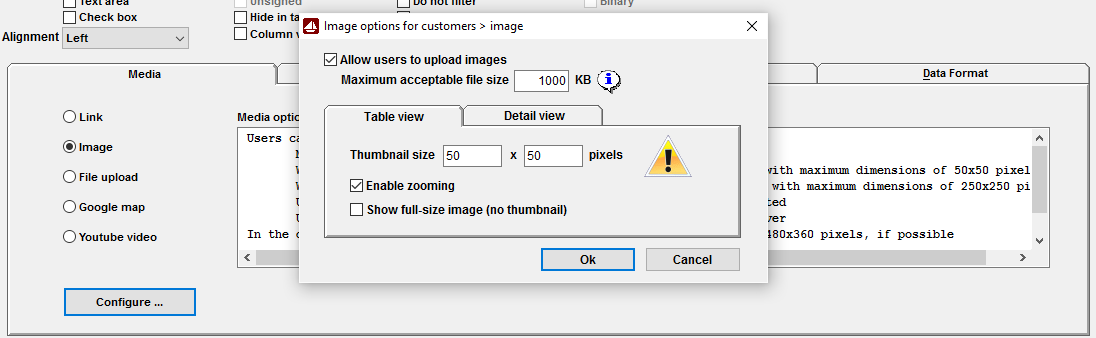
You can choose how to display the image. It can be displayed as a zoomable thumbnail image in the table and detail view. You can also configure the thumbnail size.
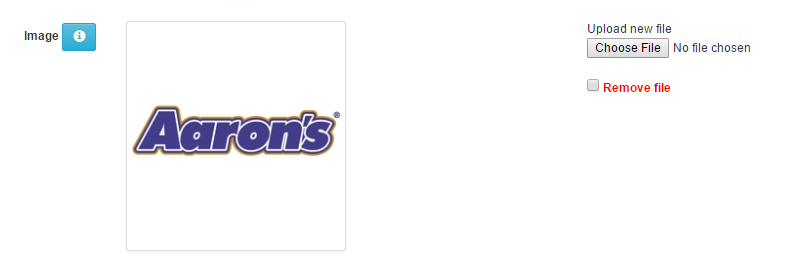
This is an example of how the image is displayed in the detail view.
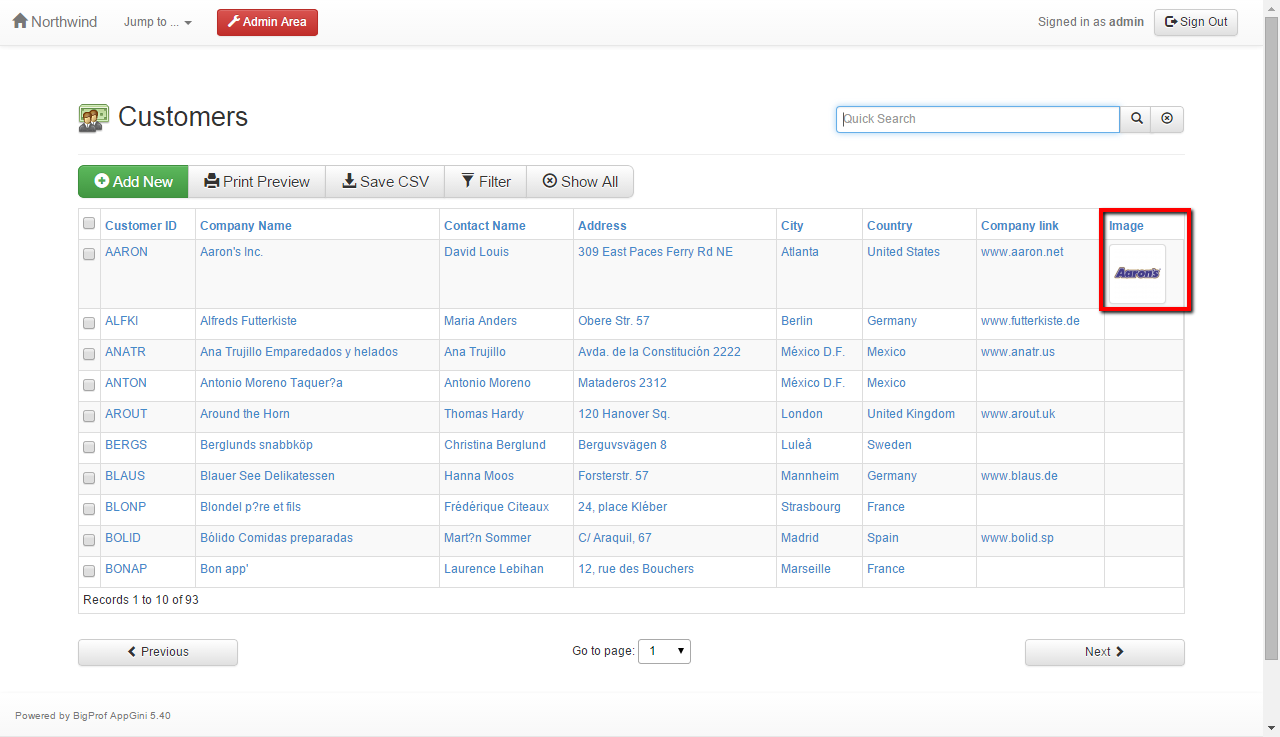
And this is how the image is displayed in the table view.
The File upload option
This option allows the user to upload many different file types. You can configure the field to be displayed as the field content, clickable icon or contents of another page.

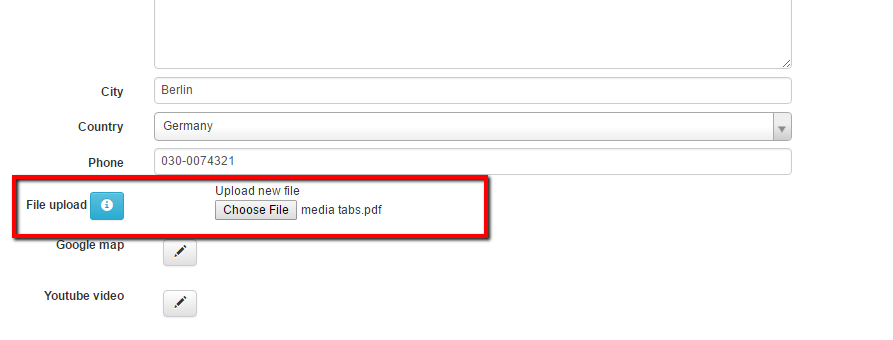
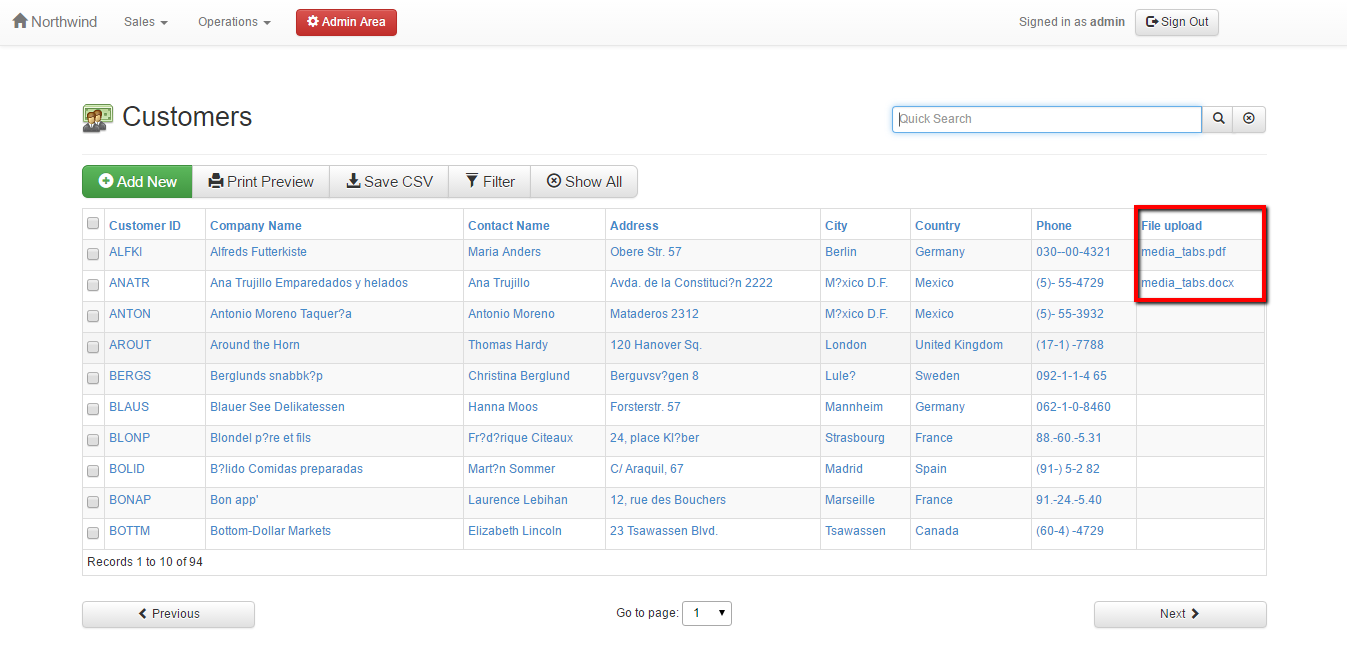
This is how the file upload field is displayed in the detail view.
You can configure the field to be displayed as the field content, clickable icon or contents of another field.
Google maps
Google map fields allow you to display a Google map in your application.

To create a Google map field, set the data type of your field to Varchar or Char with a length of at least 200 characters. Then, under the Media tab in the field properties, select the Google map option. This should open the Google map options dialog (you can open it later by clicking the Configure button in the Media tab).

Google API key
Google map fields require a Google API key to work correctly. You can enter your Google API key in the Admin settings page of your application by following the steps below:
- Sign in to your application as the super admin.
- Go to the Admin area » Utilities menu » Admin settings.
- Under the Application tab, enter your Google maps API key in the Google API key field.

If, instead of the Google map, you see an error message like Google maps Platform rejected your request..., you need to provide a correctly configured Google maps API key.
Map behavior and location options
When configuring a field to display a Google map, the following options are available for setting up map behavior and location:
1. Map from URL
Displays a map using a user-provided URL.
2. Map with a pin of the user location at the time of saving a new record
Automatically pins the user's location when a new record is saved.

3. Map with a pin of the user location at the time of saving a new or existing record
Same as the previous option, but also shows the user's location when saving an existing record.
4. Map with a pin of the user location only if the user clicks Capture my location
Shows a pin only when the user chooses to capture their location manually.

Options 2, 3, and 4 were introduced in AppGini 24.18. They require the user's consent to access their location. If the user denies access, the map will not show their location.
Map View Configuration
Table View (Thumbnail)
In the table view, the map field is displayed as a thumbnail image (static map). For option 1 above, the thumbnail map is generated from the URL provided by the user, without a pin/marker. For options 2 and 3, the thumbnail map shows the user's location at the time of saving the record, with a pin/marker. And for option 4, the thumbnail map shows the user's locationat the time when they click the Capture my location button.

- Width in pixels: Set the width of the thumbnail map shown in the table view. Default is
50pixels. - Height in pixels: Set the height of the thumbnail map in the table view. Default is
50pixels.
Detail View (Interactive Map)
- Width: Width is set automatically for the interactive map in the detail view to fit the available space.
- Height in pixels: Set the height of the interactive map shown in the detailed record view. Default is
360pixels.
Forcing the capture of the user's location
If you want to force the capture of the user's location when saving a new or existing record, set the Google map field as Required in AppGini. This will ensure that the user's location is captured before the record is saved. If the user denies access to their location, an error message will be displayed, and the record will not be saved.
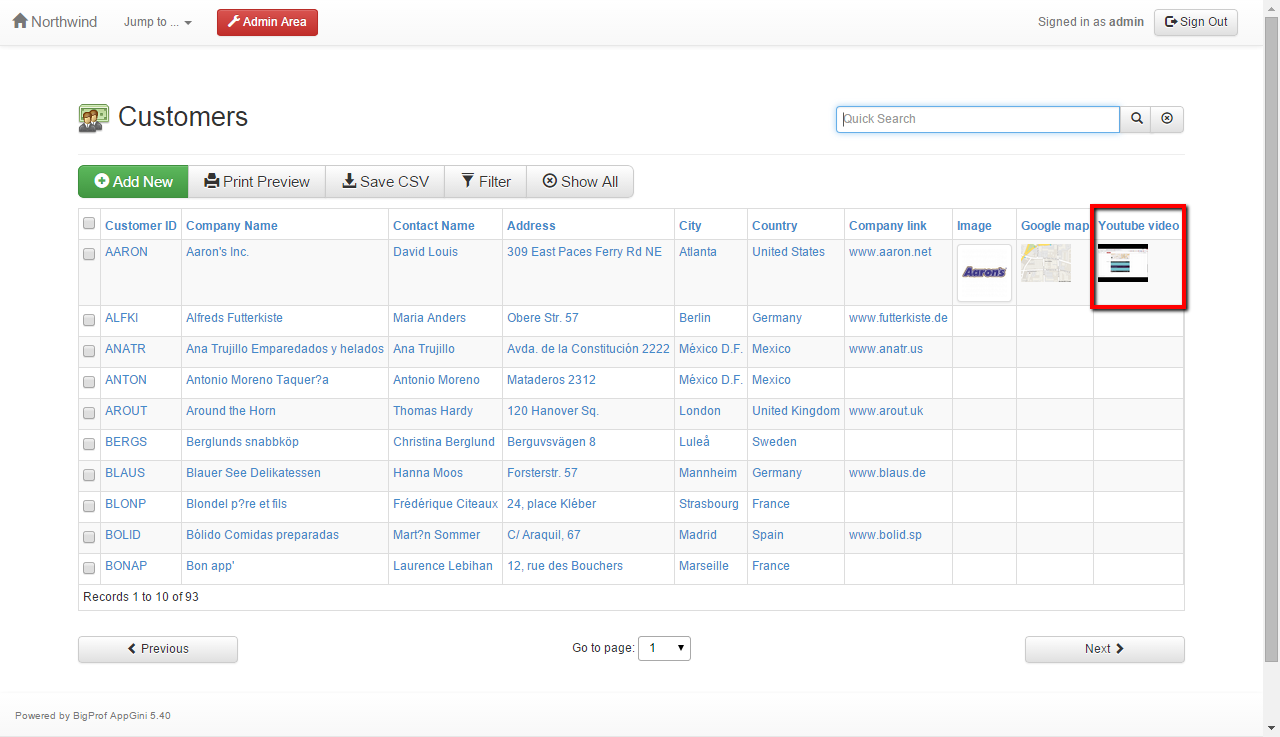
YouTube video
This field accepts a YouTube URL and displays it as a movie in the detail view.

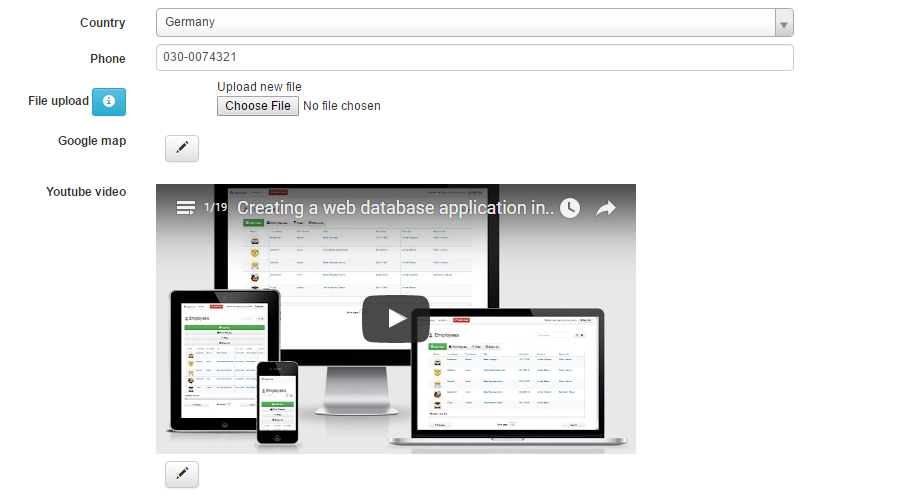
You can configure how to display the YouTube video in the detail view and the table view. Here is an example of how the YouTube video is displayed in the detail view.
And this is how the YouTube video is displayed in the table view.